
 |
|
| Did this site save (or help earn) you money? Say thanks with a small donation. |
The
TWI Designjet Documents library presented here as a courtesy of
ComputerCareOnline.com |
![]()
![]()
This error indicates that Drop Detector is not calibrated for all printheads. Possible causes are the Drop Detector or Service Station being previously replaced and the necessary calibrations not being performed. Other causes can include a faulty Drop Detector or in rare circumstances the Electronics module. Follow the steps listed below to determine the actual cause of the failure and to replace the appropriate parts.
NOTE: If the printer is installed on a Multi-Roll feeder accessory, some Multi-Roll disassembly is required to gain access to the printer. Instructions for Multi-Roll disassembly are listed at the bottom of this document for reference.
Part Description | ||
|---|---|---|
NOTE: If the printer is an "A" model,(i.e. - not a plus model) a Trailing cable must be sent with the rest of the parts listed.
NOTE: The fuse being sent should be used if a poor Trailing cable connection or a shorted Trailing cable blows the fuse on the Electronics module. Make sure to properly connect the Trailing cable or replace a shorted Trailing cable before installing the new fuse.
NOTE: If the system error code 0C0032 appeared after recent removal and replacement of an Electronics module (for `A' models) or Main PCA (for `B' models), then most likely, the calibrations backup has not been performed. If this is the case, proceed to Calibrations Backup and Pen Alignment sections listed below. If the system error persists, the service station calibration must be performed.
If any of the troubleshooting steps listed below solve the problem, attempt to verify printer functionality by printing several internal prints. If functionality is verified, no additional parts should be replaced.
NOTE: If Removal and Installation instructions are needed for reference during any repairs performed, refer to the 1000 Series Service Manual available on the Partner Care Web site for review or download.
NOTE: If printer is an "A" model, replace the Trailing cable during the Electronics Module replacement. Refer to pg. 8-39 of the 1000 Series Service Manual for removal and replacement instructions.
NOTE: Printer menu mode must be set to Full to access the Service Tests submenu. To verify, at the Ready prompt, scroll to the PRINTER SETUP icon, and press Enter. Use the arrow keys to scroll to Utilities and press Enter. Scroll to Menu Mode =. Select Full (if needed), press Enter, and then press the back key to return to the main menu.
NOTE: This procedure transfers the backup EEROM contents from the ink tube system to the EEROM on the newly installed electronics module (`A' models) or main PCA (`B' models).
NOTE: Do NOT use Clear Film, Vellum or Natural Tracing paper when performing a Pen Alignment Calibration.
Only remove the corresponding side cover of the Multi-Roll that requires maintenance. For example, only remove the right side cover of Multi-Roll if only the right end cover of the printer requires removal to complete the necessary service. Follow the steps listed below to gain access to the printer to complete the necessary service.
NOTE: Only ONE CE needs to be dispatched to perform service on a 1000 Series printer attached to a Multi-Roll feeder.
WARNING: Turn both the printer and the Multi-Roll feeder Off and disconnect them from the power source prior to performing any maintenance.
Figure 1: Two screws that secure the left door to the Multi-Roll feeder.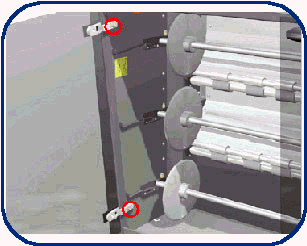
CAUTION: Be careful when removing the door not to break it.
Figure 2: Two star screws that secure the front top-cover.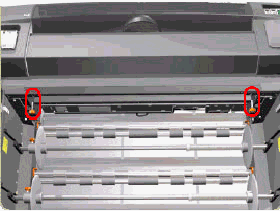
Figure 3: Six screws T-20 screws to be removed.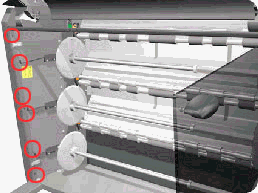
Figure 4: Seven T-20 screws to be removed.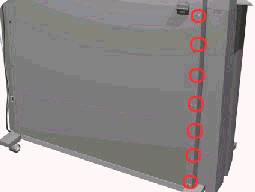
Figure 5: Removing the left side cover.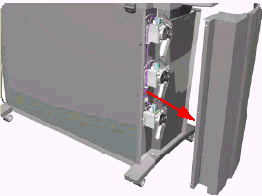
WARNING: Turn both the printer and the Multi-Roll feeder Off and disconnect them from the power source prior to performing any maintenance.
Figure 6: Six T-20 screws to be removed.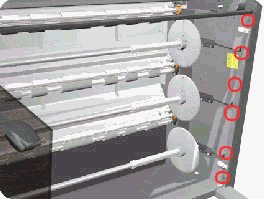
Figure 7: Nine T-20 screws to be removed.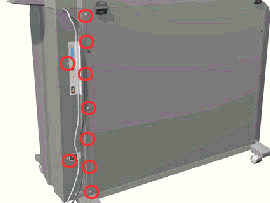
Figure 8: Rear Top cover.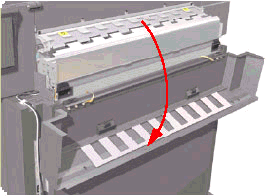
Figure 9: Cable to be released.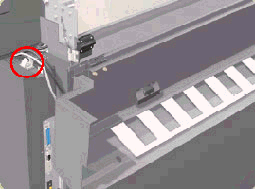
Figure 10: Removing the right side cover.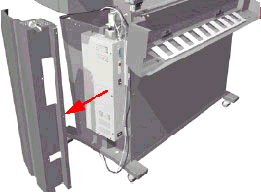
Follow the procedures listed above in reverse order.
Copyright Hewlett-Packard Co. 2001
This information is subject to change without notice and
is provided "as is" with no warranty.
Hewlett-Packard shall not be liable for any direct,
indirect, special, incidental or consequential damages
in connection with the use of this material.
Click here to return to TWI Documents Library Index Page