Did this site save
(or help earn) you money?
Say thanks with a
small donation.
|
The
TWI Designjet Documents library presented here as a courtesy of
ComputerCareOnline.com
The owners of this website have no affiliation to Hewlett Packard nor do we
claim to represent HP
in any way shape or form.
Return
to TWI Documents Library Index Page
|
HP Designjet ColorPro Printers - Grinding or Squeaking Noise when Printing

In this document:

KRS document number: BPP90119
Last Updated: 06-May-2002
Minimum skill level: 2
The printer makes a grinding or squeaking noise caused by carriage movement when printing from any tray. Perform the following tests to eliminate the grinding or squeaking noise. If the noise persists, replace the whole unit.
Parts required (part numbers are subject to change)
Part Description
| Colorpro CAD
| Colorpro GA |
Whole Unit (Required) |
C7777-69143 |
C7778-69143 |
Troubleshooting
- Turn the printer off, and then turn the printer on. The grinding or squeaking noise should not occur while the printer is initializing.
- Perform a paper path test. The grinding or squeaking noise should not occur because the carriage should not be moving.
- Perform a self-test to localize the noise.
- Check the printer for obstructions by lifting the top cover and making sure nothing is blocking the carriage movement.
- Check the paper path by following the instructions below:
- Remove all media from Trays 1, 2, and 3.
- Pull out any visible stuck paper.
- Lift the top cover, and pull out any jammed paper.
- If you are unable to free the jammed paper, pull out the handle of the paper knob, pull the knob away from the printer, and rotate it to remove the paper.
- Lower the rear access door by lifting up on the two rear door latches.
- Remove the back panel by pushing the two catches inward.
- Pull out any paper that may be stuck inside.
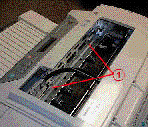
- Wipe down the milky white strip (see Figure 1) that the front of the carriage glides on with a clean, soft, dry, lint-free cloth.
Figure 1: Location of the white strip

Replace the whole unit
If the printer is still making a grinding or squeaking noise after following the steps above, replace the whole unit. See Whole Unit Replacement instructions, which are included with the whole unit replacement.
Testing
Upon replacement of the whole unit, perform a Paper Path test and a self-test as described below to verify that the new unit is functional.
Performing a paper path test
- Press the MENU button on the printer control panel until Diagnostics Menu is selected.
- Press ITEM until Perform Tray x Paper Path Test is selected.
- Press SELECT to perform the test.
NOTE: The paper path test will terminate only when the paper in the tray being tested runs out or the printer is turned off.
Performing the stand-alone self-test
- Press the MENU button on the printer control panel until Self Test Menu is selected.
- Press ITEM until Print Menu Map is selected.
- Press SELECT to perform the stand-alone self-test.
Copyright (C) Hewlett-Packard Co. 2000
This information is subject to change without notice and
is provided "as is" with no warranty.
Hewlett-Packard shall not be liable for any direct,
indirect, special, incidental or consequential damages
in connection with the use of this material.


![]()
![]()
