Did this site save
(or help earn) you money?
Say thanks with a
small donation.
|
The
TWI Designjet Documents library presented here as a courtesy of
ComputerCareOnline.com
The owners of this website have no affiliation to Hewlett Packard nor do we
claim to represent HP
in any way shape or form.
Return
to TWI Documents Library Index Page
|

In this document:
KRS document number: BPP90026
Last updated: 22 Aug, 2001
Minimum skill level: 3
System errors 010011, 12, and 13 are related to improper functionality of the printer's bail, or bail sensor. The primary causes of bail malfunction are a faulty bail sensor, sticking flag sensor, damaged bail, or the bail mech assembly. The instructions in this document will help in determining the actual cause, and replacing the appropriate parts.
Parts required (part numbers are subject to change)
NOTE: Inspect the
Encoder strip for damage or excessive wear before starting the steps below. If the
Encoder strip appears OK, clean the strip to ensure proper carriage positioning. Replace the
Encoder strip during this repair, if needed.
Check Bail Assembly Flag Sensor
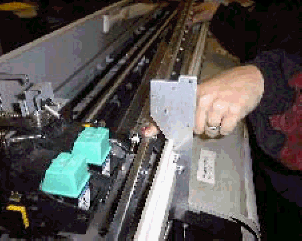
NOTE: The bail assembly flag sensor is located next to the left-hand side of the bail assembly. The lever is approximately 2mm wide, 15mm long, and is not attached to the bail assembly.
- Switch the printer off, and open the printer window.
- Lift the bail assembly by hand.
- The flag sensor is on the left-hand side of the printer, underneath the bail assembly.
WARNING: Be extremely careful when moving or cleaning the flag sensor. The flag can easily break loose from the bail sensor.
- Move the flag sensor up and down by hand until it moves freely. If the flag sensor continues to stick, gently clean the underside of the flag with a Q-tip and water.
- Close the printer window.
- Power printer on and try reloading paper.
- If loading paper is successful, the flag sensor was sticking, causing the bail not to function correctly. No parts need to be replaced.
- If loading paper is unsuccessful, continue with the next section.
Run the Bail Sensor Test
- Switch the printer on, and allow printer to complete initialization.
- Press the ENTER button.
- Use the arrow buttons to scroll to the Utilities menu, and press ENTER.
- Simultaneously press the ENTER and UP arrow buttons to access the Service Tests submenu.
- Using the arrow buttons, scroll to Bail Sensor, and press ENTER.
- Manually raise and lower the bail while looking at the front panel to see if messaging is consistent with the bail being up or down.
- If the sensor is not recognizing proper bail movement, check bail sensor manually by pressing the flag sensor and observing the printer's display prompt. Replace the bail sensor if failing.
- If the sensor is working properly, continue with remaining steps.
Perform a Bail Calibration
- Press ENTER at the Status display.
- Using the arrow buttons, scroll to the Utilities menu, and press ENTER.
- Simultaneously press the ENTER and UP arrow buttons to access the Service Test submenu.
- Using the arrow buttons, scroll to Bail Calib and press ENTER.
- The bail will rise.
- Press the UP arrow button, each time the button is pressed the bail will raise slightly.
- Press the UP arrow button until the bail makes a slight falling motion (approximately .25 inch). This is the correct 'up' position.
- Press ENTER to write the calibration value to the EEROM.
- Power cycle the printer to store the calibration value in the EEROM.
- Try loading paper.
- If paper loads correctly, verify printer functionality by performing paper loading procedure two times with sheet paper (8.5 x 11), and two times with roll paper.
- If the paper does not load, or problems still exists with loading paper, continue with remaining steps.
Check the Bail Assembly
- Remove the bail from the printer by pressing the right bail bracket towards the center of the printer. This will push the support post away from the side support brackets, allowing easy removal of the bail assembly.
- Check the bail brackets on both the left and right ends to ensure a 90-degree angle with the bail. Replace bail assembly if needed.
- Check the support posts on left and right bail brackets for damage or wear. Replace bail assembly if needed.
- If no problem is found with the bail, continue with the remaining steps.
Install the bail mech upgrade kit
- Remove the window assembly, and the left end cover.
- Remove the bail assembly, the
encoder
strip, and the service station.
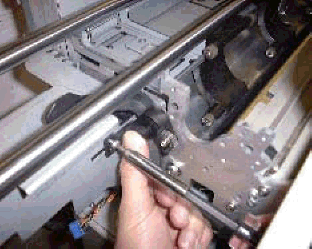
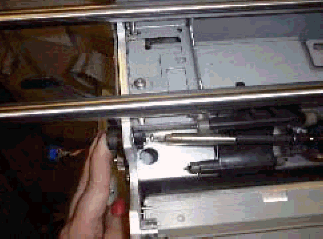
CAUTION: Be extremely careful when removing the Service Station, the Stepper Motor Assembly and Assembly Rods are fragile and will break if not removed manually.
Figure 1: Stepper motor assembly and assembly rods
- Remove the media-axis motor.
- Remove the
cutter
assembly, and the carriage.
- Remove the overdrive clutch, and the overdrive assembly.
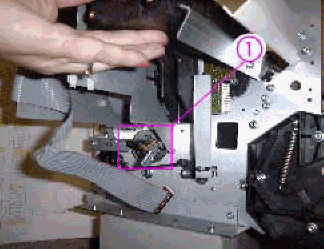
NOTE: Lift the right side of the overdrive up about two inches and pull hard to the right. DO NOT break or lose the white nylon bearing.
Figure 2: White nylon bearing
- Remove the old Y-tensioner bracket.
- Use scissors or needle-nose pliers to remove teflon or spring washers if present.
- Install new Engaging lever/gear into sideplate. Attach Auto Cam onto Engaging gear shaft.
- Use two screwdrivers to securely fasten the Auto Cam onto the Engaging gear to ensure a tight fit.
- Insert the tightening screw into the Auto Cam. Place a finger on the Cam gear as you tighten the screw into position.
NOTE: The screw must go in straight, and be flush. The plastic screw will create the threading, and must not be over tightened. If not, a new Bail-Mechanism kit must be ordered.
Figure 4: Cam gear being tightened
- Attach new Y-Tensioner bracket onto sideplate with support gear cam in the slider position.
- While firmly pressing the Support Gear Cam into the Cam Gear, insert the two plastic screws.
- Test the new bail mechanism by pressing down on the engaging lever. All of the cams should spin freely.
NOTE: If you feel any lateral movement in the Engaging lever, loosen and refasten the Support Gear Cam into the Cam Gear.
- Attach spring to the Engaging lever and Y-Tensioner bracket assembly.
- Reassemble the printer.
- Perform a Bail calibration (listed above).
- Perform an Edge sensor calibration (listed below).
- Ensure printer functionality.
Edge Sense Calibration
- Press ENTER at the Status display.
- Use the arrow buttons to scroll to the Utilities main menu. Press ENTER.
- Simultaneously press the ENTER and UP arrow buttons to access the Service Test menu.
- Scroll to Edge Sense Calib, and press ENTER.
- Messages on the display will inform you when to load media for the calibration to proceed. Part of the calibration procedure is an automatic performance of the pen alignment procedure. The calibration takes approximately four minutes to complete.
Copyright (C) Hewlett-Packard Co. 2000
This information is subject to change without notice and
is provided "as is" with no warranty.
Hewlett-Packard shall not be liable for any direct,
indirect, special, incidental or consequential damages
in connection with the use of this material.